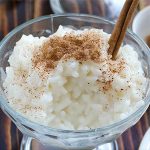
Are you a sushi lover but find the thought of making sushi rice at home intimidating? Fear not, as making sushi rice in a rice cooker is a quick and easy solution to your problem. In this article, we’ll provide a step-by-step guide on how to make sushi rice in a rice cooker that is perfect for making different types of sushi.
Ingredients
Before we dive into the steps, let’s first take a look at the ingredients required for making sushi rice in a rice cooker. Here’s what you’ll need:
- Short-grain white rice
- Rice vinegar
- Sugar
- Salt
- Water
When it comes to choosing the right rice, short-grain white rice is the best option as it has the perfect texture and stickiness required for making sushi rice and it has a slightly sweet flavor. In terms of rice vinegar, unseasoned rice vinegar is preferred. Sugar and salt are added to balance out the flavor.
Steps of Making Sushi Rice in a Rice Cooker
Sushi rice is the foundation of any good sushi dish, and making it in a rice cooker is a simple and efficient way to achieve great results. By following a few easy steps, you can make perfect sushi rice every time. Even if you’re up for making banana Nutella sushi, you can try out these steps.
Step 1: Choosing the Proportion
The first step is to determine the amount of rice needed for the serving size of your sushi. A good rule of thumb is to use 1 cup of rice for every 1-2 sushi rolls. For example, if you’re making 4 sushi rolls, you’ll need 2 cups of rice. Here’s a table indicating how much rice you’ll need for different serving sizes:
| Sushi Type | Rice Amount (cups) | Water Amount (cups) |
| Nigiri Sushi | 1.5 | 2 |
| Maki Sushi (Small Roll) | 1.5 | 1.75 |
| Maki Sushi (Large Roll) | 2 | 2.5 |
| Chirashi Sushi | 2.5 | 2.75 |
Step 2: Preparing the Rice and Rice Cooker
After choosing the right proportion, rinse the rice in cold water to remove excess starch. Let the rice soak for 30 minutes and then transfer it to the rice cooker. Add the appropriate amount of water according to the table above.
Most good rice cooker brands have a “sushi” setting, which is the perfect option for cooking sushi rice. If your rice cooker doesn’t have a “sushi” setting, then use the “white rice” setting instead.
Step 3: Soaking the Rice
Soaking the rice is a crucial step in making sushi rice as it ensures that the grains cook evenly and absorb the right amount of water. This step also helps to remove any excess starch that may cause the rice to become sticky or clumpy.
To soak the rice, first, rinse the rice several times with cold water until the water runs clear. This will help to remove any impurities or dust that may be present on the rice. After rinsing, place the rice in a bowl and add enough water to cover it completely. Let the rice soak for at least 30 minutes, but no more than an hour.
The ratio of water to rice depends on the type of rice you are using. Most sushi rice brands have instructions on the packaging that provide the correct ratio of water to rice. Generally, a 1:1.2 or 1:1.25 ratio of rice to water is used for sushi rice.
It’s important not to skip this step or to soak the rice for too long as this can affect the texture of the rice. If the rice is not soaked enough, it may not cook evenly, and if it’s soaked for too long, the grains may become too soft and lose their shape.
It’s a good idea to follow a cooking guide when making sushi rice to ensure the rice is cooked perfectly.
Step 4: Cooking the Rice in Rice Cooker
Once the rice has soaked for 30 minutes, start the rice cooker. It should take approximately 20 minutes for the rice to cook. Make sure not to open the lid during this time, as it will release the steam and affect the cooking process.
Step 5: Mixing the Vinegar Mixture
While the rice is cooking, prepare the vinegar mixture. In a small saucepan, heat the rice vinegar, sugar, and salt over low heat until the sugar and salt dissolve. Once dissolved, remove from heat and let the mixture cool.
The ratio of rice vinegar to rice varies based on the serving size and rice type. For 2 cups of rice, you’ll need 1/3 cup of rice vinegar, 2 tablespoons of sugar, and 1 teaspoon of salt.
However, this ratio can be adjusted according to your preference. Some people like their sushi rice to be more or less tangy, so you can adjust the amount of vinegar and sugar accordingly.
Step 6: Folding the Vinegar Mixture into the Rice
Once the rice is cooked, transfer it to a large mixing bowl. Slowly add the vinegar mixture to the rice while folding it in gently with a rice paddle or wooden spoon.
It’s essential to be gentle when mixing the rice, as you don’t want to break up the grains or create a mushy texture. Keep folding the rice until it’s evenly coated with the vinegar mixture.
To properly fold the vinegar mixture into the rice, use a slicing motion with a wooden spoon or paddle. Slice into the rice and then fold it over, gently mixing in the vinegar mixture. Repeat this motion until the vinegar mixture has been evenly distributed throughout the rice.
Step 7: Preparing the Cooked Rice for Different Types of Sushi
Once the rice is ready, you can use it to make a variety of different sushi rolls, such as maki, nigiri, or temaki. To make maki, place a sheet of nori on a bamboo mat, spread a layer of sushi rice over the nori, and add your desired fillings. Roll the sushi tightly using the bamboo mat and slice it into bite-sized pieces.
To make nigiri, shape the sushi rice into small balls using wet hands, and top with your desired toppings, such as raw fish or cooked shrimp.
To make temaki, place a small amount of sushi rice on a sheet of nori, add your desired fillings, and roll the nori into a cone shape.
Conclusion
Making sushi rice in a rice cooker is an easy and convenient way to prepare this delicious dish at home. With a few simple ingredients and some basic techniques, you can make perfectly cooked and seasoned sushi rice every time. So, why not give it a try and impress your family and friends with your homemade sushi-making skills?


Leave a Reply